
Key Takeaways
- Kayak outriggers are removable pontoon-like floats attached to arms on each side of your hull, dramatically reducing side-to-side roll and making activities like fishing, photography, and standing far more stable.
- Modern outrigger kits come in two main types: inflatable versions (typically $50–$100) that pack down small, and hard-shell polyethylene options ($150–$250) that offer superior durability.
- Most kits fit standard sit on top kayak and sit-inside designs using simple bolt-on, clamp-on, or track-mount systems that require only basic tools and 10–30 minutes of installation time.
- While outriggers add stability dramatically, they don’t make your kayak impossible to flip in extreme conditions—a properly fitted PFD and safe paddling habits remain essential.
- This guide covers outrigger types, key features to evaluate, installation basics, and which paddlers benefit most from adding this equipment to their vessel.
What Are Kayak Outriggers and Why Use Them?
Outriggers are floats or pontoons mounted on adjustable arms that extend from each side of your kayak hull, typically positioned slightly aft of the paddler’s seat. This simple concept traces back over 3,000 years to Austronesian-speaking peoples in Southeast Asia, who first attached lateral support floats to their canoe hulls to enhance stability on open seas.
In the context of modern kayaks, these stabilizers transform a narrow, tippy hull into a much wider platform by adding buoyant contact points on both sides. The effect is similar to converting a unicycle into a tricycle—you gain multiple points of support that resist tipping. Kayak outriggers provide additional stability to the vessel, making it more difficult to capsize. The kayak’s width is a key factor in stability, and outriggers can compensate for a narrower kayak by increasing its effective width.
Here’s how the difference plays out in practice:
Condition | Kayak Without Outriggers | Kayak With Outriggers |
|---|---|---|
Calm lake | Requires constant balance attention | Feels planted and secure |
Light chop | Frequent bracing needed | Floats handle most roll |
Boat wake | Risk of capsize without quick reaction | Manageable with minor lean |
Standing attempt | Challenging for most paddlers | Achievable in calm water |
The key principle is leverage and buoyancy working together. When you lean to one side, the float on that side pushes down into the water and resists the tip. Field tests have shown that quality outriggers can reduce tip angle from around 45 degrees to under 10 degrees when dealing with offset loads—a dramatic improvement that changes how confident you feel on the water.
One important point: kayak outriggers are removable accessories, not permanent hull modifications. You can paddle with them when you want extra stability and remove them when you prefer a sleeker, faster setup.
Benefits of Kayak Outriggers on the Water
The primary value of outriggers comes down to confidence and safety rather than speed or performance. When you’re not constantly worried about capsizing, you can actually enjoy your time on the water.

Stability Advantages
- Reduced fear of capsizing in wind, boat wakes, and choppy conditions
- Easier entry and exit at docks and shorelines without the boat rolling away from you
- More forgiving balance when shifting heavy loads like coolers, tackle crates, or camera gear
- Confidence with passengers when taking kids or dogs who tend to move unexpectedly
Platform for Standing and Active Use
Outriggers create a stable platform that lets you stand to sight-fish, cast heavier lures, or paddle short distances while upright in flat or lightly choppy water. For kayak fishing enthusiasts, this opens up techniques that were previously reserved for boat owners.
Photography and Videography
If you’ve ever tried to capture a steady shot of wildlife from a tippy kayak, you understand the frustration. Kayak stabilizers give you the steady base needed to avoid blurry photos and shaky footage. Birdwatchers and nature photographers often find outriggers essential for their water-based work.
Extended Paddling Confidence
Many paddlers who were previously nervous in rougher conditions find that outriggers installed on their yak extend their paddling distance and trip frequency. When you trust your equipment, you’re more willing to explore new water.
Types of Kayak Outriggers
Most kayak outriggers fall into two broad categories: inflatable and hard-shell (usually polyethylene). Each has distinct advantages depending on your storage space, budget, typical water conditions, and how often you need to remove or transport the kit.
Many popular consumer kits include aluminum or stainless arms paired with either PVC inflatable floats or molded plastic pontoons. While DIY foam or PVC pipe stabilizers exist, this guide focuses on ready-made kits that the average paddler can purchase and install without fabrication skills.
Inflatable Kayak Outriggers
Inflatable outriggers use PVC or TPU bladders with protective outer shells, similar in construction to inflatable kayaks or SUP accessories. They typically deflate and pack down to backpack size.
Common Kit Configuration:
- Two inflatable floats
- Aluminum or stainless sidekick arms
- Mounting hardware and straps
- Typical price: $50–$100 USD ($55–$110 CAD) as of 2026
Key Advantages:
- Lightweight at 5–10 pounds per pair
- Compact storage when you deflate them
- Quick inflation with a hand pump or included blow tube
- Easy to carry and transport in a car trunk or closet
Limitations to Consider:
- More vulnerable to punctures from rocks, oyster beds, barnacles, or submerged branches
- Require patch kits and periodic pressure checks
- May feel slightly less rigid than hard-shell options
Ideal Users: Paddlers with limited storage space at home, travelers who need a packable kit, and occasional anglers who don’t want a bulky permanent setup.
Hard-Shell Polyethylene Outriggers
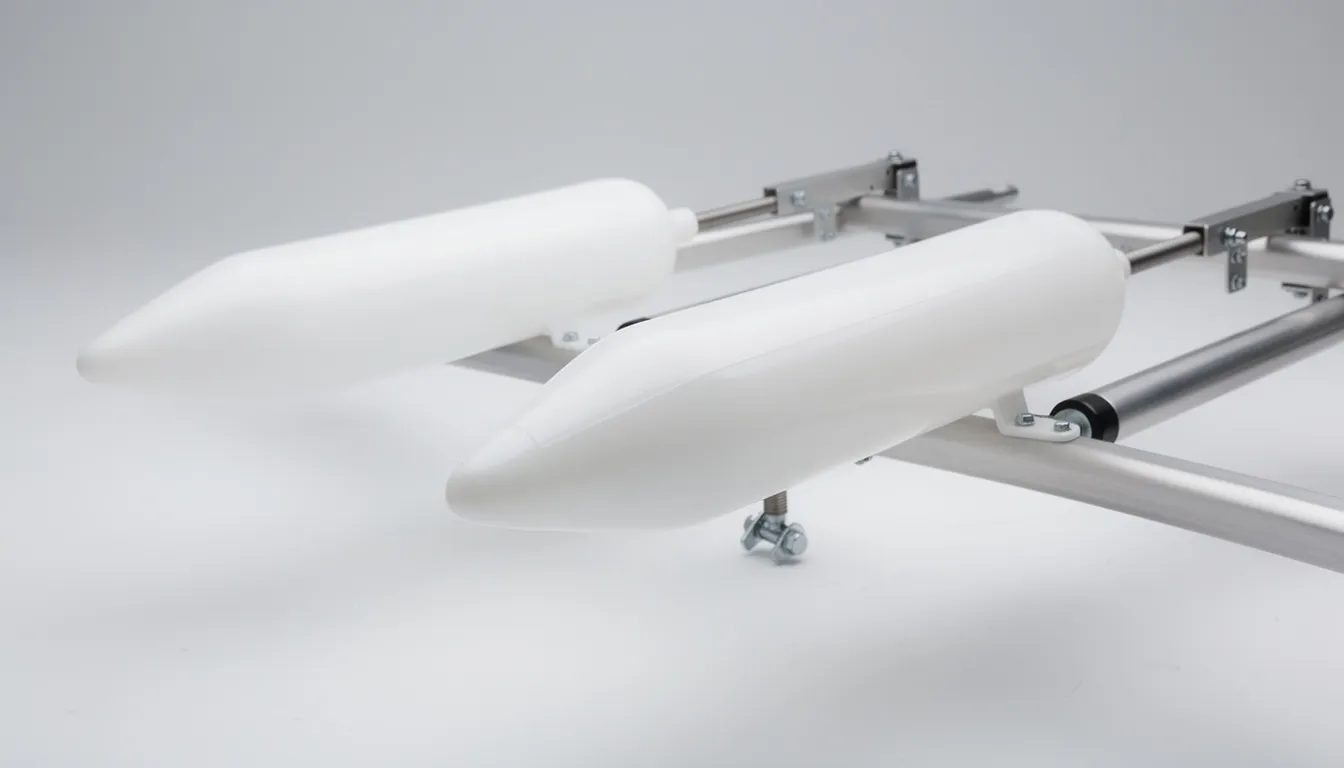
Hard-shell outriggers are rigid pontoons made from high-density polyethylene (HDPE) or similar plastics—often the same durable, UV-resistant material used in rotomolded kayaks.
Design Features:
- Torpedo-shaped or banana-shaped floats
- Some models integrate small storage compartments or rod holders
- Typical weight: 10–20 pounds per pair
- Price range: $150–$250 for quality systems
Key Advantages:
- Very durable—resists scraping on rocks and boat ramps
- Provides consistent buoyancy without inflation
- Feels more solid underfoot when you stand
- Requires minimal maintenance beyond occasional cleaning
Drawbacks:
- Bulkier to store and transport
- Generally heavier than inflatable options
- Higher upfront cost
Ideal Users: Frequent anglers, paddlers in rougher or rocky environments, and users who prioritize durability and long-term use over compactness.
Key Features to Look For When Buying Outriggers
The right kit depends on your kayak type, paddler weight, intended use (fishing, touring, adaptive paddling), and budget. Before ordering, take time to:
- Measure your kayak’s width and length
- Check for existing mounting points (gear tracks, rod holders, accessory rails)
- Consider your typical water conditions and activities
- Read recent user reviews (2023–2026) for real-world feedback on stability, durability, and installation difficulty
- Verify if the outrigger kit you want is in stock, as availability can vary and some popular models may sell out quickly
Buoyancy and Size of the Floats
Float volume and length directly influence how much extra stability you gain. The kayak’s width is also a key factor in determining stability and the appropriate size of floats—a wider kayak generally offers better stability and may require different float sizing. Heavier paddlers or those carrying substantial gear need larger, more buoyant floats.
Paddler/Use Case | Recommended Float Size |
|---|---|
Light recreational use on calm lakes | Smaller floats (adequate volume) |
Standing to fish in mild chop | Medium to large floats |
Heavy gear loads (batteries, coolers) | Larger, high-volume pontoons |
Tandem kayak or heavy paddler | Maximum available volume |
Keep in mind that oversized floats placed too close to the waterline can create minimal drag issues if they run fully submerged during normal paddling. Height and angle adjustment help you dial in the right balance.
Adjustability of Arms and Mounts
Look for these adjustment features:
- Telescoping arms to fine-tune distance from the hull, balancing stability against drag
- Vertical adjustment to set floats just kissing the surface (less resistance) or slightly deeper (maximum stability)
- Angle adjustment to position floats slightly aft of your paddle stroke and reduce interference
- Tool-free mechanisms like locking pins or hand knobs for quick on-water tuning
The ability to make adjustments without specialized tools proves helpful during your first few outings as you dial in your preferred setup.
Mounting System and Compatibility
Common mounting approaches include:
Mount Type | Best For | Considerations |
|---|---|---|
Bolt-on universal receivers | Permanent installation on any kayak | Requires drilling; most secure |
Track-mount bases | Fishing kayaks with gear tracks | Slides into existing rails; easy removal |
Clamp-on systems | Canoes and wide sit-on-tops | No drilling; may shift if not tightened properly |
Before purchasing, verify:
- Access inside the hull for backing plates or nuts (especially on sit-inside kayaks)
- Compatibility with factory-installed accessory rails or rod holders
- Whether the kit includes adapters for your specific deck thickness and shape
Materials, Corrosion Resistance, and Price
Common Materials:
- Anodized aluminum arms
- Stainless steel fasteners
- HDPE or PVC floats
- Reinforced plastics for clamps and receivers
For saltwater or brackish water use, corrosion-resistant hardware is essential. Stainless fasteners and sealed fittings prevent the rust and loosening that can create safety issues over time.
Price Tiers:
- Budget inflatable kits: Under $80
- Mid-range kits: $80–$150
- Premium hard-shell or fully adjustable systems: $150 and up
Don’t focus solely on the lowest price—poor hardware can corrode or loosen, turning a stability aid into a hazard. Balance cost against reliability and how frequently you’ll use the system.
Outrigger Safety Precautions
When using kayak outriggers, prioritizing safety is essential for a secure and enjoyable experience on the water. Start by always wearing a properly fitted life jacket—this is your first line of defense in any paddling situation. Before launching, double-check that all kayak outrigger hardware and equipment are securely attached and in good condition. Inspect for any signs of wear, loose bolts, or damaged floats, and address any issues before heading out.
Stay aware of your environment: monitor weather conditions, water depth, and potential hazards like rocks, submerged branches, or strong currents. Keep your weight centered and maintain a stable posture in your kayak to maximize the stability that outriggers provide. Practicing good paddling technique not only helps you move efficiently but also reduces the risk of accidental tipping, even with extra stability from your outriggers.
It’s also wise to carry a reliable means of communication, such as a waterproof phone or two-way radio, in case you need assistance. If you’re new to kayaking or using outriggers, consider taking a paddling course or seeking advice from experienced paddlers to build your confidence and skills. Remember, a little preparation goes a long way in ensuring your time on the water is both safe and enjoyable.
How to Install Kayak Outriggers
Installation ranges from simple clamp-on setups taking 10–20 minutes to more involved bolt-on installations requiring drilling. Always start by reading the manufacturer’s instructions specific to your kit, then use this guidance as a general reference.
Basic Tools Commonly Needed:
- Drill with marine-grade bits
- Measuring tape
- Pencil or masking tape for marking
- Screwdriver or wrench set
- Marine sealant for drilled holes
Safety Note: Double-check fit on dry land, then test stability in shallow water near shore before committing to deep-water use.
Planning Mount Locations
Choose a mounting position that’s:
- Slightly behind the paddler’s seat (typically 60–70% toward the stern)
- Low enough to be near the waterline when loaded
- High enough to avoid constant drag during normal paddling
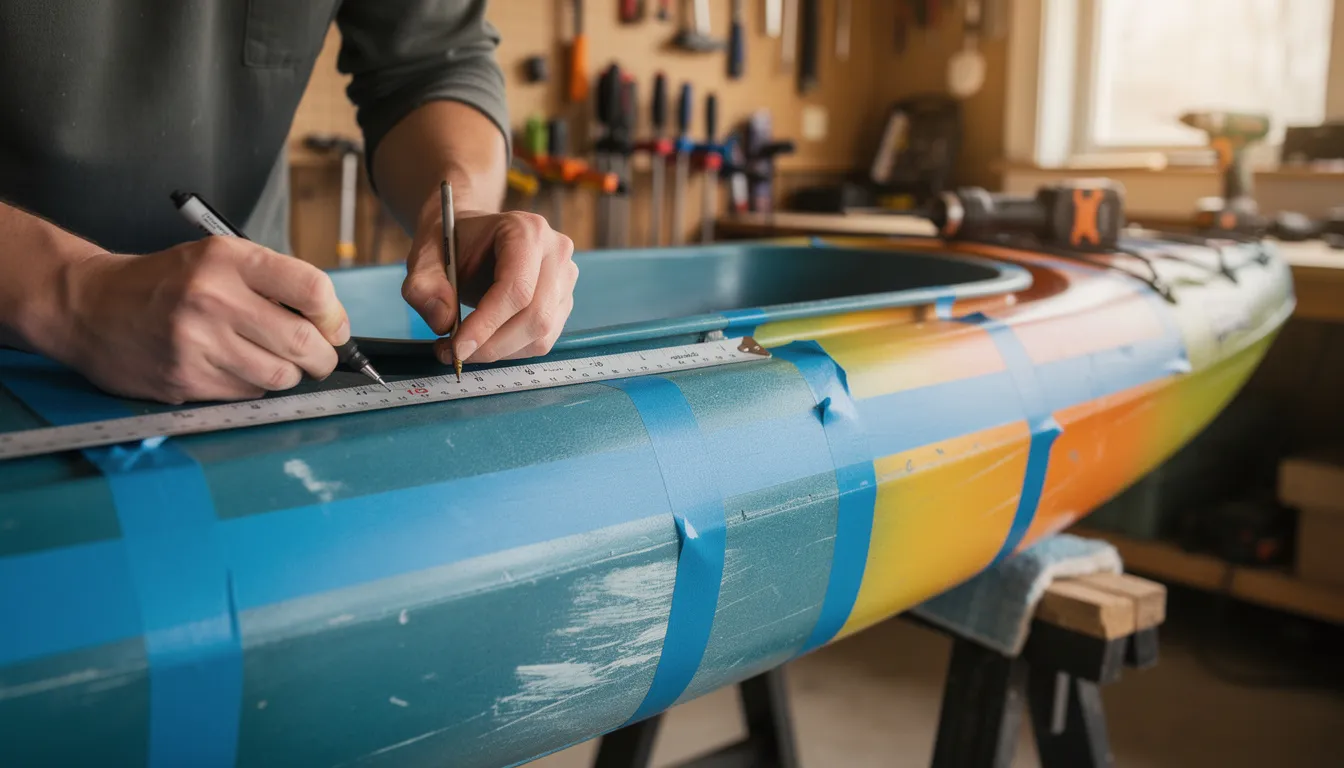
Mark potential locations with tape and do a dry fit of the arms and floats. Confirm they clear your paddle stroke and don’t block hatches, rudder controls, or existing gear like fishing crates or coolers.
On a sit on top kayak, mounts typically attach to the rear deck or existing accessory tracks. Sit-inside kayaks may use the deck area near the cockpit rim.
Drilling and Bolting (Bolt-On Systems)
Step-by-Step Process:
- Measure twice using the manufacturer’s template
- Mark holes clearly with a pencil or tape
- Drill pilot holes first, then expand to final size
- Install backing plates or large washers inside the hull to spread load
- Apply marine sealant around each hole and under the mount
- Tighten bolts firmly but not excessively
Sit-inside kayaks require internal access for nuts and backing plates. If access is limited, you may need to use existing deck plates or create access points.
Clamp-On and Track-Mount Installations
Clamp-on options attach to gunwales or rails without drilling—popular for canoes and wide sit-on-tops with sturdy sidewalls.
Track-mount bases slide into standard kayak gear tracks (common on many fishing kayak models) using T-bolts or similar connectors. This approach offers:
- Easy installation and removal
- No permanent holes in your hull
- Flexibility to reposition as needed
Tighten clamps and track fittings firmly but carefully—over-tightening can deform plastic rails or crack hull edges. Re-check all connections during your first few outings.
Adjusting and Testing on the Water
Start in calm, shallow water and systematically adjust:
- Arm length: Move floats further out for more stability, closer for better maneuverability
- Float height: Adjust so floats lightly touch the water in neutral conditions
- Angle: Fine-tune fore-aft position to minimize paddle interference
Test these specific scenarios:
- Leaning side to side deliberately
- Sitting sideways on the seat
- Standing up and sitting back down (if that’s your goal)
- Simulating a water re-entry if relevant to your use
Carry the necessary tools for on-the-spot adjustments during your first several trips until you find your optimal setup.
Who Should Consider Kayak Outriggers?
Outriggers benefit many types of paddlers, from complete beginners to dedicated anglers and adaptive users. Even experienced paddlers appreciate them for specific tasks like fly fishing or taking kids and pets aboard.
Rental businesses, summer camps, and adaptive programs often rely on stabilizer systems to open kayaking to a wider range of participants who might otherwise feel excluded.
Beginners and Nervous Paddlers
Outriggers reduce early-stage anxiety by making the kayak feel more like a wide jon boat or small skiff than a narrow, tippy craft. This confidence boost helps new paddlers:
- Focus on paddling technique and navigation instead of constant balance bracing
- Build skills faster without fear limiting their practice
- Enjoy outings from day one rather than white-knuckling through learning curves
Consider starting with outriggers for your first several outings, then experiment with removing them in calm conditions as your skills improve. Families teaching children often appreciate the added peace of mind when kids lean, shift, or reach over the side unexpectedly.
Anglers and Stand-Up Users
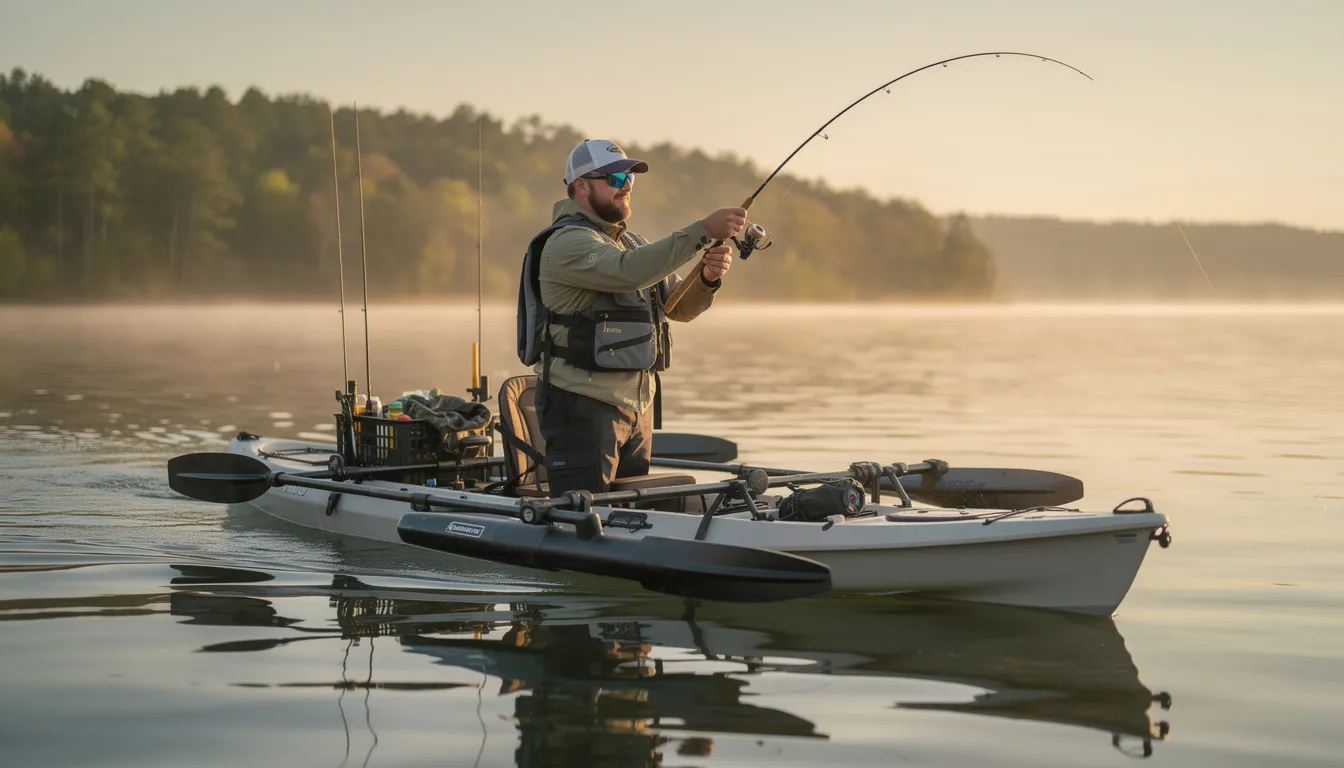
Kayak fishing enthusiasts gain significant advantages:
- Stable platform for standing to sight-fish, cast heavier lures, or fight fish near the boat
- Reduced sudden roll when shifting weight to reach into crates, coolers, or tackle boxes
- Easier net work when landing fish
- Confidence to reel in larger catches without worrying about capsize
Some kayak anglers pair outriggers with anchors, stake-out poles, or trolling motors to convert their kayak into a compact fishing skiff. For regular stand-up fishing in mild chop or around boat wakes, prioritize larger floats and more robust mounting systems.
Aging, Injured, and Adaptive Paddlers
Paddlers with reduced core strength, balance challenges, or limited mobility can use outriggers to maintain independence on the water. The system makes:
- Entry and exit from docks or shorelines more predictable
- Recovery from minor balance losses nearly automatic
- Confidence rebuilding after injury much faster
Consider a paddler returning after knee or hip surgery—outriggers allow them to ease back into paddling during their first season without the fear of a sudden capsize testing their healing joint.
Adaptive programs, camps, and rehabilitation centers should consider outriggers as part of a broader safety and accessibility toolkit.
Using Kayak Outriggers Effectively
Proper use, not just installation, determines how much benefit you get from your outrigger setup. These systems can be adjusted differently depending on whether you want maximum stability, moderate stability with better speed, or occasional backup support.
Good paddling technique and awareness of conditions remain important even when your kayak feels very stable.
Dialing in Stability vs. Speed
Setting floats deeper into the water increases stability but also increases drag, reducing speed and potentially affecting tracking.
Setup Options:
Goal | Float Position | Trade-off |
|---|---|---|
Maximum stability | Floats partially submerged | Slower paddling, more drag |
Balanced approach | Floats just touching water | Good stability with minimal drag |
Speed priority | Floats slightly above water | Less stability, better speed |
Most anglers and photographers accept slower cruising speeds for rock-solid stability during their main activity. Experiment over several trips to find your preferred compromise.
Paddling Technique with Outriggers
Maintain your normal forward stroke and check that paddle blades clear the floats and arms at all angles. If you’re hitting the equipment, adjust mount position or arm length.
Key points to remember:
- Outriggers don’t completely replace edging skills—practice basic bracing strokes and turning techniques
- Lean gently to each side to feel how and when floats engage, building trust in their support
- In tight spaces like narrow creeks or mangrove tunnels, shorter arm extension improves maneuverability
Maintenance and Care
Simple maintenance habits extend the life of your equipment:
For All Systems:
- Rinse arms, hardware, and floats with fresh water after saltwater or muddy use
- Check for sand or debris in moving parts
- Periodically retighten bolts and clamps
- Replace worn straps, knobs, or fasteners before they fail
For Inflatable Outriggers:
- Check air pressure before each outing
- Inspect for abrasions or small leaks
- Keep a small patch kit in your kayak
- Store fully deflated in cool, dry conditions
For Hard-Shell Floats:
- Inspect for cracks, deep gouges, or loose end caps
- Touch up hardware with corrosion inhibitor spray as needed
- Check that drainage ports remain clear
Outrigger Troubleshooting
Even the best kayak outriggers can occasionally present challenges, but most issues are easy to resolve with a systematic approach. If you notice your kayak feeling less stable than usual, start by checking that all hardware and connections are secure—loose bolts or clamps can compromise stability. For inflatable outriggers, ensure the floats are fully inflated and free from leaks or punctures; a quick inspection and a patch kit can save the day.
If you’re experiencing balance problems, try adjusting the position of your outriggers—moving the arms further out or changing the float height can make a significant difference in stability. Should you encounter difficulty with installation or removal, consult the manufacturer’s instructions for guidance, or reach out to a professional for help.
Outrigger Storage and Transport
Proper storage and transport of your kayak outriggers are essential for maintaining their performance and extending their lifespan. After each outing, rinse your outriggers with fresh water to remove salt, sand, or debris, then allow them to dry completely before storage. Store your outriggers in a cool, dry place, away from direct sunlight and extreme temperatures, to prevent material degradation.
For inflatable kayak outriggers, deflate the floats and store them in a protective bag or container to avoid punctures or creases. Hard-shell models should be kept off the ground and away from heavy objects that could cause dents or cracks. When transporting your outriggers, use a sturdy bag or case to shield them from bumps and scratches, and consider using a cart or dolly to make moving your kayak and outriggers easier.
Always follow the manufacturer’s recommendations for storage and transport, as proper care is essential for preserving the stability and reliability of your equipment. With the right storage habits, your outriggers will be ready to provide extra stability and support whenever you hit the water.
Outrigger Warranty and Support
When investing in kayak outriggers, it’s essential to consider the warranty and support provided by the manufacturer. A strong warranty offers peace of mind, covering defects and damage for a set period—typically one to three years. Before making a purchase, review the warranty terms to ensure they cover both the floats and hardware, and check the process for making a claim if needed.
Reliable customer support is equally important. Look for manufacturers who offer accessible support channels, clear instructions, and helpful resources such as installation guides or troubleshooting tips. The availability of replacement parts and accessories can also be a deciding factor, ensuring your kayak outriggers remain in top condition for years to come.
Choosing a reputable brand with a solid warranty and responsive support team is essential for protecting your investment and ensuring you always have the help you need, whether you’re on the water or preparing for your next adventure.
Outrigger Community and Resources
The world of kayak outriggers is supported by a vibrant community of paddlers, manufacturers, and enthusiasts eager to share their knowledge and experiences. Online forums, social media groups, and dedicated websites are excellent places to find helpful tips, product reviews, and advice on everything from installation to advanced paddling techniques.
Many manufacturers also provide instructional videos, detailed guides, and FAQs to help you get the most out of your kayak outriggers. Engaging with the community can be especially helpful for troubleshooting, discovering new products, or learning about the latest innovations in stability and safety.
Whether you’re a beginner looking for setup advice or an experienced paddler seeking to refine your technique, tapping into these resources can enhance your paddling experience and help you make the most of your outriggers. The collective wisdom of the outrigger community is an invaluable asset for anyone passionate about kayaking and enjoying the water with confidence.
Frequently Asked Questions About Kayak Outriggers
Do outriggers make a kayak impossible to flip?
Outriggers greatly reduce the likelihood of capsizing in normal conditions—especially from casual leaning or small wakes—but they don’t make your kayak unsinkable or impossible to flip. Large waves, surf, strong currents, or aggressive standing in rough water can still overcome the extra buoyancy and leverage.
A properly fitted PFD and conservative decision-making remain mandatory safety measures regardless of your stabilizer setup.
Will outriggers fit my specific kayak model?
Most universal kits work with a wide range of recreational and fishing kayaks, both sit-on-top and sit-inside designs. Before you purchase, check:
- Hull width and available flat mounting areas
- Existing gear tracks or accessory rails
- Access inside the hull (for sit-inside models requiring backing plates)
When in doubt, contact the manufacturer or retailer with photos and your kayak’s model information to verify compatibility.
Do outriggers get in the way of paddling or fishing?
Correctly positioned outriggers mount slightly behind your hips and extend far enough out that paddle blades clear them during a normal stroke. You may need to cast and land fish slightly differently at first, but most anglers adapt quickly after a few sessions.
Test your paddle strokes and common movements in shallow water, adjusting arm length or angle until any interference disappears.
Can I leave the outriggers on my kayak all the time?
Many paddlers leave hard-shell systems mounted throughout the season when storing kayaks on racks or trailers with adequate clearance. However, for car-top transport, storage in tight spaces, or long highway drives, removing the outriggers protects both the kit and your kayak.
Follow manufacturer guidelines for trailering and car-topping—most recommend removing or fully retracting the arms.
Are outriggers worth it if I only paddle on calm lakes?
Even on calm lakes, wind gusts, unexpected boat wakes, and sudden movements can cause balance issues. For beginners, older paddlers, anglers who want to stand, or anyone nervous about capsizing, outriggers transform how relaxed and confident you feel on the water.
If that extra confidence helps you paddle more often and actually enjoy your time rather than worrying, adding outriggers is usually a beneficial investment.
Whether you’re a nervous beginner working on your paddling technique or an experienced angler looking to stand and cast from your fishing kayak, the right outrigger setup can fundamentally change your relationship with your time on the water. Start by measuring your kayak, identifying your mounting options, and choosing a kit that matches your storage space and budget.
Test your setup in calm, shallow water near shore, dial in your preferred stability settings over your first few trips, and you’ll quickly discover why so many paddlers consider outriggers essential equipment for confident, enjoyable kayaking.